
Homemade Cherry Pie Filling
Introduction
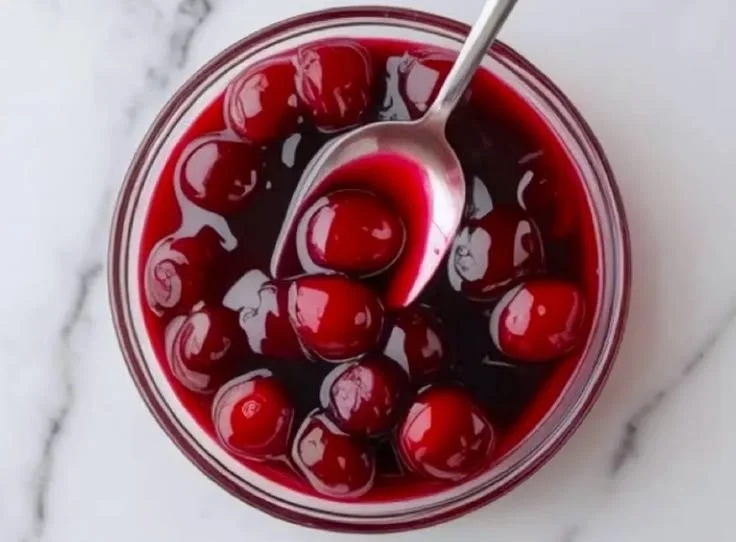
There’s a moment when a pot of simmering cherries fills the kitchen with a bright, sweet-tart perfume that instantly transports you back to warm summer afternoons and holiday kitchens. The first spoonful of this homemade cherry pie filling offers a glossy, jammy texture that yields just enough to the fork—tender cherry flesh suspended in a silky, slightly tangy glaze. It’s the kind of flavor that makes people smile, invites second helpings and conjures the comfort of family gatherings.
This filling is perfect for so many occasions: spooned over vanilla ice cream on a weeknight, rolled into thumbprint cookies for neighbors, or as the star in a rustic 9-inch pie at Thanksgiving. If you’re short on time but crave homemade warmth, you’ll love how quick it is to put together. If you’re into bite-size treats, try my spin on cherry pie bites for parties — they’re a delightful miniature alternative and a guaranteed crowd-pleaser: delicious cherry pie bites.
At a Glance
- Prep Time: 15 minutes
- Cook Time: 10–12 minutes
- Total Time: 25–30 minutes
- Yields: about 2 cups of cherry pie filling (enough for one 9-inch pie or ~8 servings)
- Servings: 8 (about 1/3 cup per serving)
- Difficulty Level: Easy — beginner-friendly; no special equipment required
Nutrition Highlights
Estimated nutrition per serving (1/3 cup; recipe yields ~8 servings). Values are calculated from standard ingredient nutrition profiles and rounded; estimates are based on data from USDA FoodData Central.
- Calories: ~140 kcal
- Total Fat: 0.2 g
- Saturated Fat: 0 g
- Carbohydrates: ~34.5 g
- Dietary Fiber: ~1.6 g
- Total Sugars: ~28.5 g (naturally occurring + added)
- Protein: ~0.9 g
- Sodium: ~73 mg
Notes: These are estimates and will vary with cherry variety and exact measurements. For more precise tracking, use your ingredient labels or a nutrition calculator referencing USDA FoodData Central. If you’re monitoring sugar or carbohydrate intake for medical reasons, consult a registered dietitian or healthcare provider (resources such as the CDC and Mayo Clinic provide reliable guidance on dietary management).
Why You’ll Love It
- Irresistible flavor: Bright, slightly tart cherries balance just enough sugar so the fruit’s character shines through rather than being cloying.
- Versatility: This filling shifts effortlessly from pie to parfaits, crepes, yogurt bowls, and sauces.
- Emotion & tradition: Making cherry filling by hand connects you with simple, tactile cooking—the popping of cherries as you pit them, the glossy finish after the cornstarch thickens—perfect for creating new family memories.
- Speed and reliability: From clean-up to a filled jar in under 30 minutes, it’s ideal for last-minute desserts or planned baking projects.
How to Make Homemade Cherry Pie Filling
Ingredients
- 4 cups fresh pitted cherries (about 600 g)
- 3/4 cup granulated sugar (150 g) — adjust to taste for tart cherries
- 1/4 cup cornstarch (32 g)
- 1/4 cup cold water (60 ml) — for cornstarch slurry
- 2 tablespoons fresh lemon juice (30 ml)
- 1/8 teaspoon fine salt
- 1 teaspoon vanilla extract (optional; 5 ml)
Optional ingredients and substitutions: - For deeper flavor: 1/2 teaspoon almond extract (substitute or use with vanilla)
- For less sugar: substitute 1/2 cup sugar + 1/4 cup erythritol or reduce sugar to 1/2 cup (texture slightly altered)
- For a thicker jammy texture: increase cornstarch to 1/3 cup (43 g)
- For a dairy-free pie top: this filling is already dairy-free
Step-by-step Instructions
- Wash and pit the fresh cherries. Use a cherry pitter or gently halve and remove pits by hand. Place the pitted cherries in a medium saucepan.
- Add the granulated sugar, lemon juice, and salt to the cherries and stir to combine. Let sit 5–10 minutes to macerate if time allows—this helps draw out juices and intensify flavor.
- In a separate small bowl, whisk the cornstarch with 1/4 cup cold water to create a smooth slurry with no lumps.
- Heat the cherry-sugar mixture over medium heat, stirring occasionally, until it comes to a low boil and the cherries soften (about 5–7 minutes).
- Stir in the cornstarch slurry and continue cooking, stirring constantly, until the mixture thickens and turns glossy (about 1–2 minutes after adding slurry). Reduce heat if bubbling too vigorously—boiling hard can break down the fruit too much.
- Remove from heat and stir in the vanilla extract (or almond extract if using). Taste and adjust sweetness or lemon as needed.
- Allow the filling to cool to room temperature before using in pies, tarts, or storing. The filling will thicken further as it cools.
Practical tips:
- Avoid overcooking: long, high boils will break cherries and make the filling overly soft. Gentle, steady bubbling is ideal.
- Check cornstarch doneness: the filling should cling to a spoon; if it seems thin after cooling, return to low heat and add a small extra slurry (1 teaspoon cornstarch mixed with 2 teaspoons water) to refine thickness.
- If you prefer a smoother sauce, pulse the cooled filling a couple times in a food processor.
Best Pairings
- Classic: Spoon into a hot baked 9-inch pie with a flaky top crust and a scoop of vanilla ice cream.
- Breakfast: Warm over pancakes, waffles, or spread inside a toasted brioche for a sweet morning treat.
- Simple snack: Stir a few tablespoons into plain Greek yogurt with granola.
- Afternoon pairing: Serve with a strong black tea or a latte for balance. For a playful dessert duo, serve alongside warm apple desserts — try pairing with warm apple cider whoopie pies for a seasonal dessert board: warm apple cider whoopie pies.
- Cheese board: A small bowl of cherry filling brightens creamy cheeses like mascarpone, brie, or triple-cream.
How to Store
- Room temperature: If you store the finished filling in a sterilized jar and you plan to use it within a day, keep it at room temperature out of direct sunlight — but refrigeration is recommended for safety after opening.
- Refrigerator: Store in an airtight container for up to 7–10 days. Reheat gently before using if needed.
- Freezer: Freeze in freezer-safe containers or resealable bags for up to 3 months. Thaw in the refrigerator overnight and stir gently to restore texture; reheat briefly if you want it warm.
Pro Tips & Tricks
- Best cherry types: Tart cherries (Montmorency) give classic pie brightness; sweet cherries (Bing) make a sweeter filling—mix them for complexity.
- Texture cues: The filling should coat the back of a spoon and show a distinct gloss when done—if it’s cloudy, it likely needs a touch more cornstarch and gentle heating.
- Flavor layers: A splash of liqueur (kirsch or amaretto, 1 tablespoon) added off-heat brings an aromatic lift for adult desserts.
- Avoid grainy cornstarch: Always mix cornstarch into cold water first; adding it directly to hot liquid causes lumps.
- Acid balance: Lemon juice brightens the flavor and helps set the filling. Add more only a few drops at a time to avoid over-acidity.
Creative Twists
- Boozy Cherry Compote: Add 2 tablespoons of bourbon or brandy at the end for a warm, boozy note—great on ice cream.
- Spiced Cherry Filling: While cooking, add a cinnamon stick and 2 whole cloves; remove before cooling for autumnal depth.
- Low-sugar version: Replace half the sugar with a granulated sweetener like erythritol and increase lemon juice slightly to balance sweetness. Add 1–2 tablespoons of chia seeds after cooling to help thicken naturally if you omit cornstarch.
- Mixed-berry blend: Swap half the cherries for raspberries or blackberries for a tart-sweet berry medley—reduce cooking time to preserve delicate berries.
Recipe Q&A
Q: Can I use frozen cherries?
A: Yes. Thaw and drain excess liquid before cooking; you may need slightly more cornstarch to achieve the same thickness.
Q: My filling is too thin after cooling—what can I do?
A: Mix 1 teaspoon cornstarch with 2 teaspoons water and whisk into the warm filling; bring to a gentle simmer until thickened.
Q: How can I lower the sugar without losing texture?
A: Reduce sugar to 1/2 cup and add 1–2 tablespoons of unsweetened apple sauce for body; consider using a sugar substitute that measures cup-for-cup.
Q: Will this work as canning/preserving?
A: This recipe is for short-term refrigeration/freezing. If you want shelf-stable jars, follow USDA-tested canning recipes and procedures—do not assume this stovetop method is safe for long-term shelf storage without proper canning guidance.
Conclusion
Make this homemade cherry pie filling when you want an elegant, fruit-forward component that lifts everyday desserts and special-occasion pies alike. If you’d like a similar filled-treat idea to serve at a gathering, check this creative homemade cherry pie filling recipe for more inspiration and technique notes. For a dessert pairing idea that leans into cozy fall flavors, you can compare serving suggestions at Cherry Pie Filling | Cookies & Cups.
I’d love to hear how you use this filling—share photos or questions in the comments and join our community of home bakers. Happy cooking!